Connect SAP and Excel in 4 simple steps
Introduction
Connecting SAP and Excel is the first step to automating your repetitive tasks. In this guide, you'll learn how to set up this connection in 4 simple steps using the most reliable method.
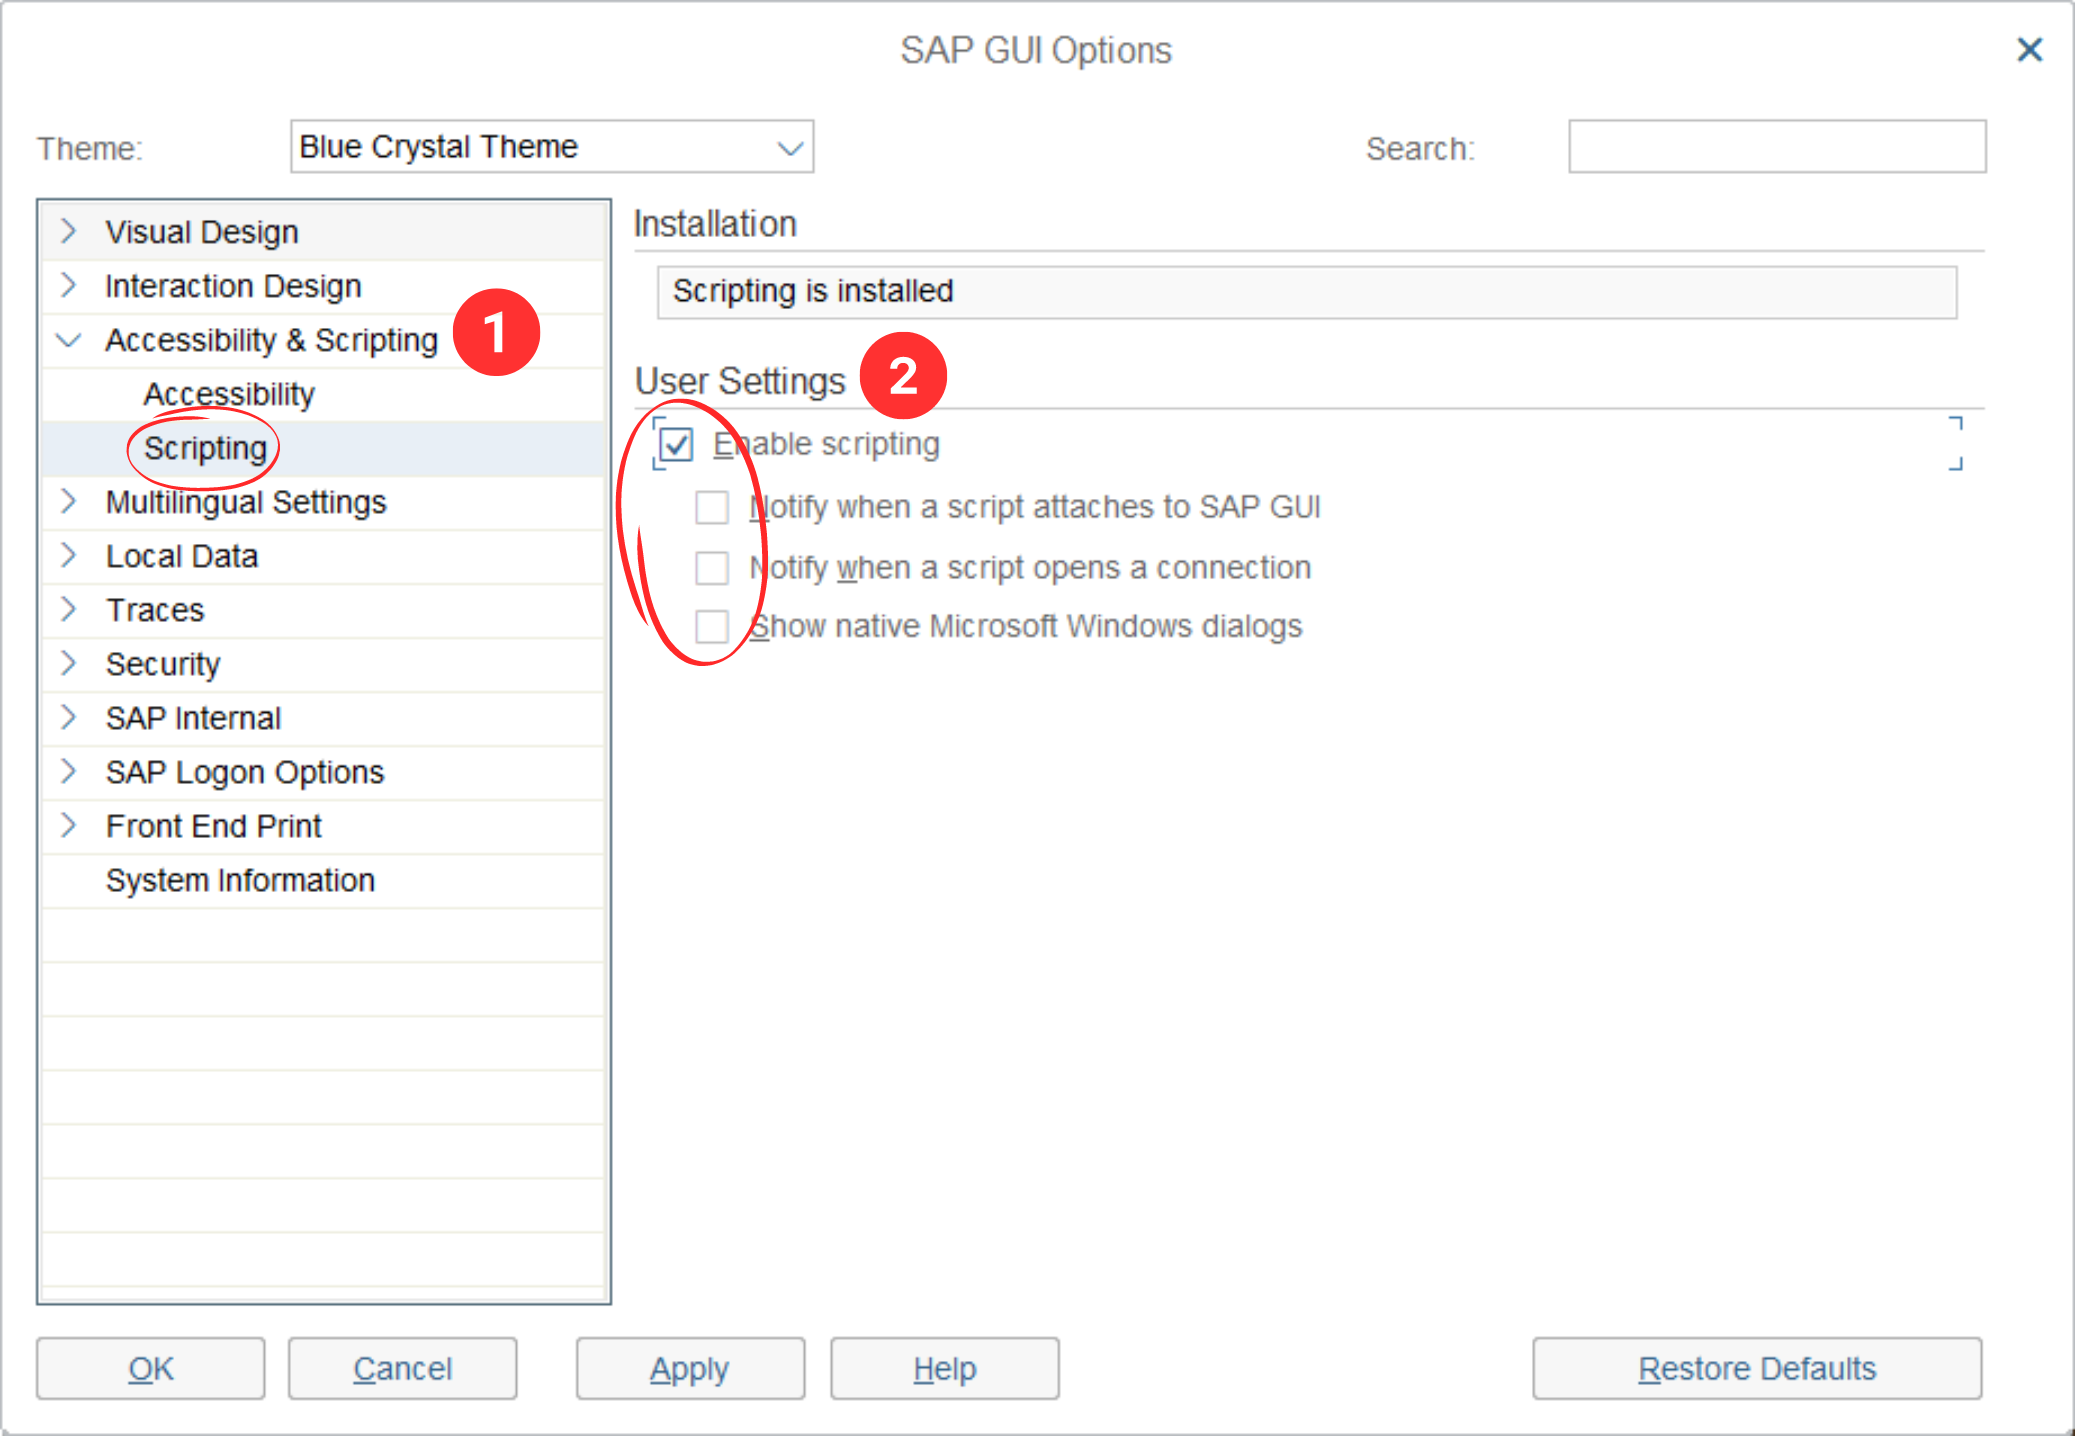
Step 1: Enable Scripting in SAP
Access the SAP GUI Options menu, navigate to Accessibility & Scripting, then select Scripting. Check "Enable scripting" and uncheck the other options.
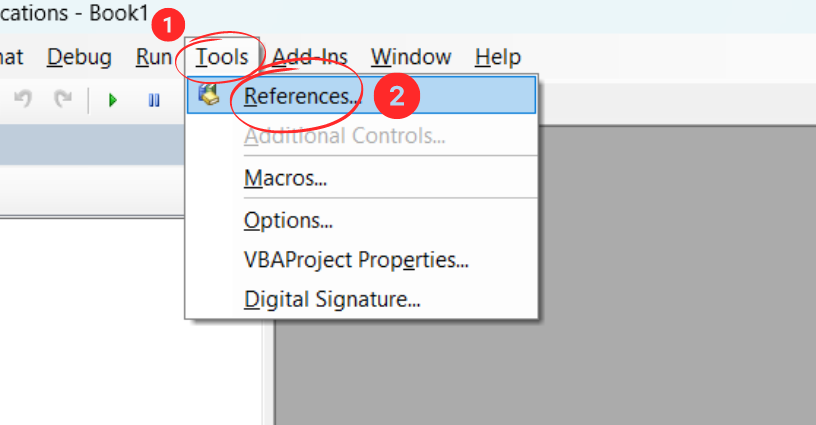
Step 2: Activate the SAP GUI API Reference in Excel
A. Open Developer Tools
Launch Excel, access the Developer tab, and open Visual Basic.

B. Navigate to References
In the VBA editor, go to the Tools menu and select References.

C. Activate the SAP GUI Scripting API
Locate and activate the sapfewse.ocx extension. The file location depends on your system architecture:
- x86 (32 bits):
C:\Program Files (x86)\SAP\FrontEnd\SAPgui\sapfewse.ocx - x64 (64 bits):
C:\Program Files\SAP\FrontEnd\SAPgui\sapfewse.ocx
Step 3: Download the Connection File and Change the Server Name
A. Get the Excel File
Download the connection file from the resources page.
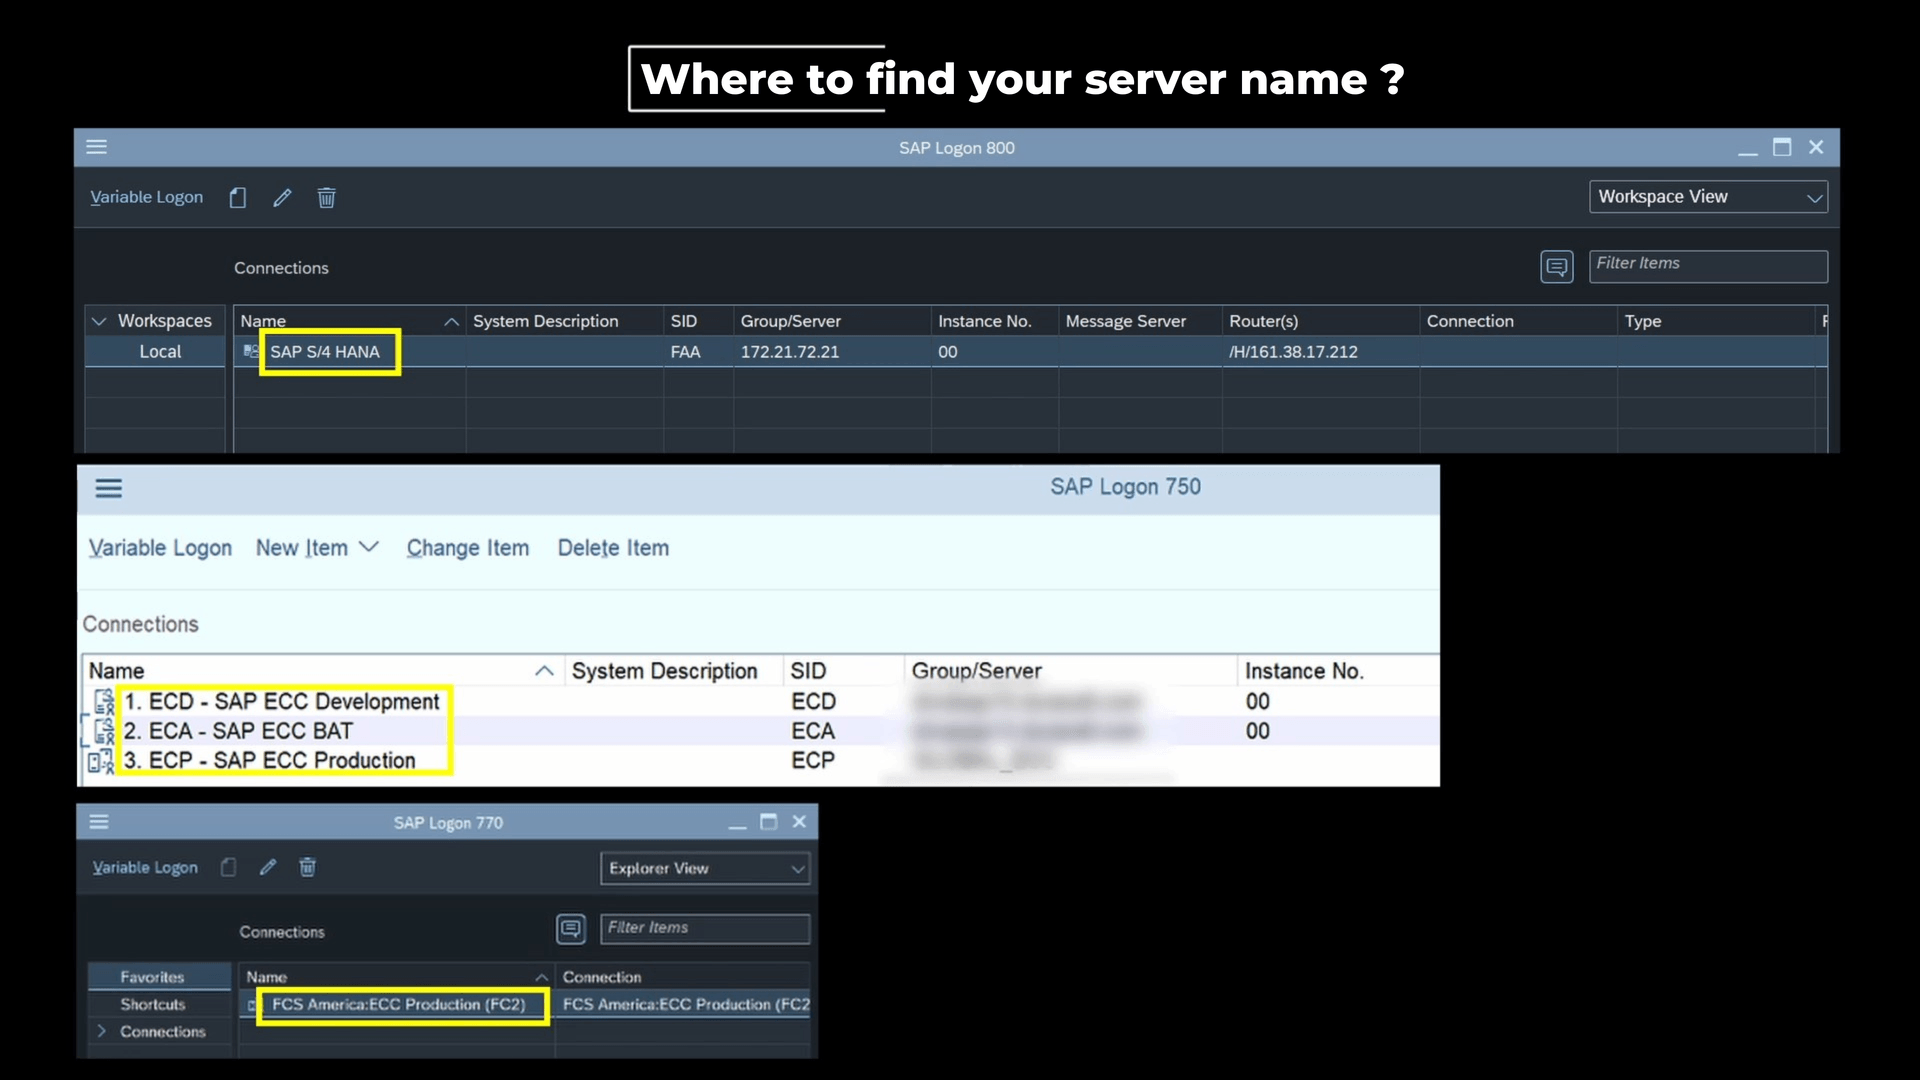
B. Configure the Server
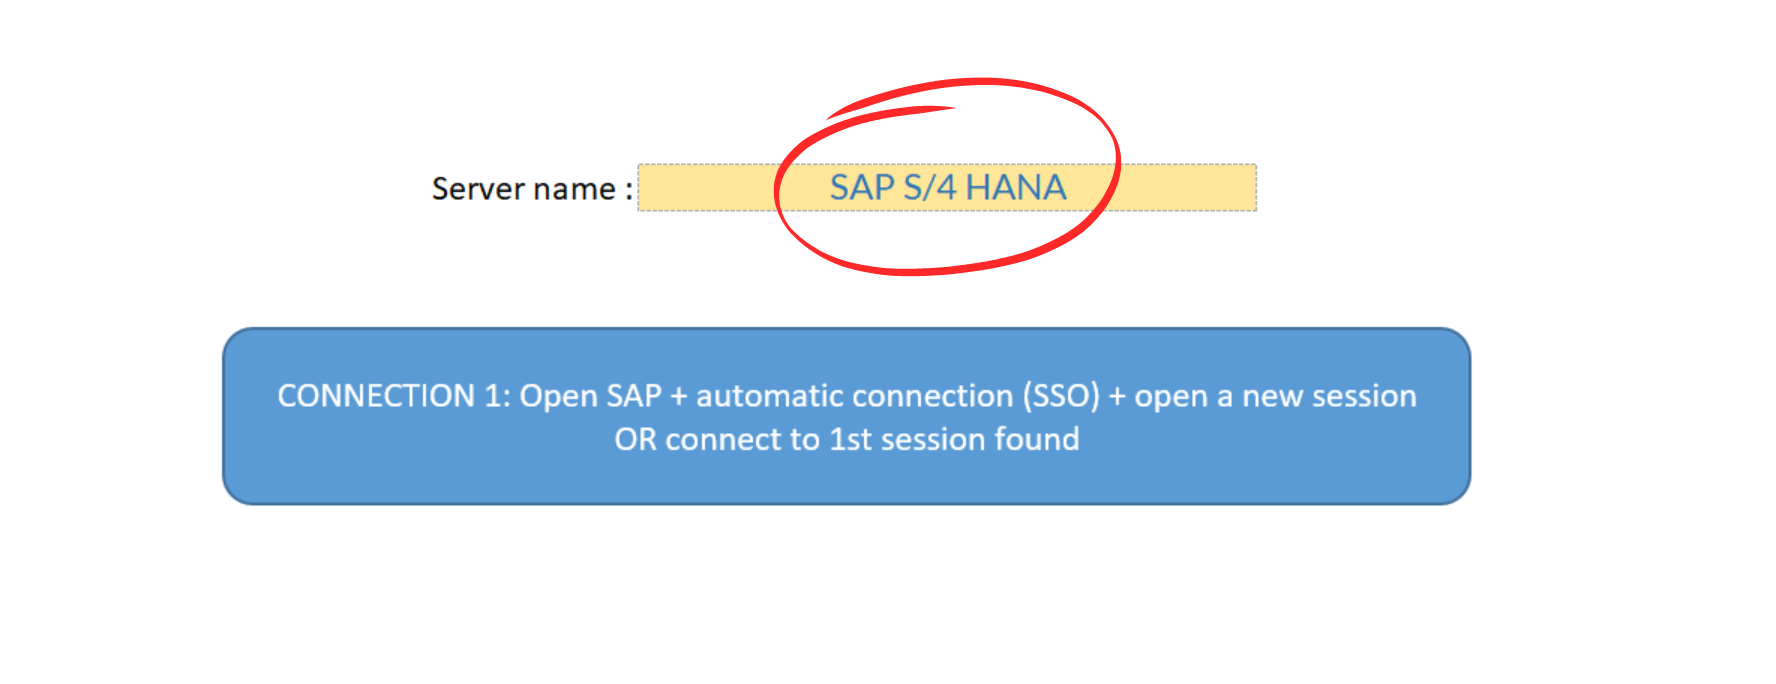
Modify the server name in the Excel file to match your specific SAP instance. You'll find your server name in your active SAP session.
Step 4: Connect Excel to SAP
Execute the connection button in the Excel file. The automation performs these actions:
- Opens SAP if not already running
- Initiates a new session if none exists
- Establishes the connection and executes a test transaction (
/nmd04)
Conclusion
You now have a working connection between SAP and Excel. The next step is to automate your first data exports.


